


Ingredients
Apple Hand Pie

2 pie crusts (homemade or store bought is fine)

1 lb crisp apples, cut into 1 cm cubes

3 tbsp salted butter

1 tsp lemon zest

1 oz lemon juice

¾ cup apple cider, the juice NOT the vinegar

2 tbsp light brown sugar

1 tsp cinnamon

1 tsp vanilla

1 tbsp corn starch

1 egg
1 tbsp water

¼ cub turbinado or demerara sugar
THE Flaky Pie Crust

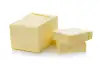
2 sticks unsalted butter

350 g all purpose flour

1 tsp salt

2 tbsp granulated sugar

½ cup ice water
Directions
Apple Hand Pie
Step 1
If you’re using premade pie dough just skip to the part where you start cutting it up. (TO MAKE THE PIE CRUST SCROLL DOWN TO STEPS 11 & 12 of the "THE Flaky Pie Crust" recipe!)

2 pie crusts (homemade or store bought is fine)
Step 2
In a medium pot, combine butter, apples, lemon zest, lemon juice, apple cider, light brown sugar, cinnamon, and vanilla. Let that simmer over medium-low for 20-30 minutes, or until the apples are very softened and liquid has reduced in half.

1 lb crisp apples, cut into 1 cm cubes
3 tbsp salted butter

1 tsp lemon zest

1 oz lemon juice

¾ cup apple cider, the juice NOT the vinegar

2 tbsp light brown sugar

1 tsp cinnamon

1 tsp vanilla
Step 3
Pour out a couple tablespoons of the liquid into a separate bowl and add the cornstarch. Use a whisk to mix together.

1 tbsp corn starch
Step 4
Add the cornstarch mix back to the pot and reduce the heat to low. Stir for about 1 minute or until the liquid thickens up significantly. Let that cool COMPLETELY before assembling the hand pies.
Step 5
While cooling, combine the egg and water and whisk until no streaks remain. Set aside.

1 egg

1 tbsp water
Step 6
Preheat oven to 425F and ideally have a baking stone in there to preheat as well.
Step 7
Once cooled, place 8 pie crust rectangles on a parchment lined baking sheet and add 3ish tablespoons to the center of the 8 rectangles. Leave at least a 1/2 in boarder around the edges.
Step 8
Brush a thin layer of egg wash around the 1/2 in pie crust boarder.
Step 9
Use the remaining 8 pie rectangles and place on top of the apple mixture. I like to match shapes of rectangles, so like if one is straight on all edges except the top right corner is curved, I’ll match those. Ya feel me?
Step 10
Gently press the two pieces of pie crust together to form a seal around the apple mixture.
Step 11
Use your bench scraper to cut away excess, untidy pie crust, so you’re left with 4 straight edges and right angles. This will also help adhere the two pieces together. Make sure you’re leaving some space between the cut and the apple filling though!!! Just cut away unnecessary dough and try to make all 8 pies similar sizes.
Step 12
Then use a fork and gently press all of the edges to add some flare AND once again pressing the two pieces together. We don’t want any leakage here!!!
Step 13
Brush all 8 hand pies with the egg wash, doing your best to avoid getting it on the parchment.
Step 14
Coat evenly with the turbinado sugar and cut at least 1 hole in the top of each pie. I prefer three little slits, but that’s just me!

¼ cub turbinado or demerara sugar
Step 15
Place the baking sheet on top of the baking stone, if using, close the oven door and immediately lower the temp to 375F. Bake for 24-32 minutes, or until golden and crispy! My oven is all over the place so I’m offering you a wide range of time. Your biggest cue is the visual!!! You want golden on top to ensure that the bottom is nice and crisp! No soggy bottoms here.
Step 16
Let cool on a wire rack and
Step 17
ENJOY!
THE Flaky Pie Crust
Step 1
To a large bowl at 350g flour, salt, and sugar. Place in the fridge while you prep the butter.

350 g all purpose flour

1 tsp salt

2 tbsp granulated sugar
Step 2
Use a bench scraper or knife to cut the butter. First lengthwise (hotdog), then flip 90 degrees and cut lengthwise (hotdog) again, then cut into 1/2 in cubes width wise. Repeat with the other stick of butter.

2 sticks unsalted butter
Step 3
Plop all of the butter pieces into the flour mixture and toss to coat in the flour. You want to break up the butter cubes so every single piece gets fully coated in flour.
Step 4
Next, gather all of the butter pieces towards one side of the bowl and taking one piece (or one in each hand) at a time, smoosh the butter cube between your thumb, index, and middle fingers. Then plop it over on the other side of the bowl. This just helps you see what has and has not been smooshed yet. Once everything is smooshed just toss to coat in the flour once again.
Step 5
If you want an insanely flaky crust, think like puff pastry, you can stop here, but if you just want reasonable flakiness we’re going to break down those pieces even farther. Just rub the butter and flour between your fingers until the largest pieces are the size of about a walnut. If you want a shorter crust you can keep processing until the mixture resembles more like a thick sand.
Step 6
Pour in the majority of your ice water into the mixture and toss everything around to incorporate. Watch out for big clumpy bits right off the bat and break those up. Sort of toss and knead for about 20 seconds, then test the hydration by squeezing a mound of dough between your hands - if it holds together it’s hydrated, if it breaks apart very easily it needs more water. If a section is hydrated just put it over to the side on the counter, and continue with the remaining mixture, adding more water little by little, until everything is hydrated and holding together. *You don’t want a soupy mess!!!! Depending on your flour you may need to add more water, just do 1 tbsp at a time.

½ cup ice water
Step 7
Once everything is hydrated, gather it all on the counter/work surface and compress into a rectangle. Lightly dust with flour and roll out to about double the length. Then letter fold by taking the top 1/3 and folding it to the center and repeating with the bottom 1/3. Rotate 90 degrees and repeat the letter fold process. It should be holding together pretty well by this point!
Step 8
Cut the dough in half and wrap both in plastic wrap. Make sure to sort of compress the dough into the edges of the plastic wrap to smooth it out and just further incorporate it.
Step 9
Refrigerate for AT LEAST 30 minutes, but up to 3 days.
Step 10
At this point you’re ready to move forward using the dough however the recipe requires! If you’re making the apple hand pies, continue to the next two steps.
Step 11
Flour your work surface, rolling pin, and dough, and roll it out to an approximately 10 x 12 in rectangle. Make sure to add more flour, flip, and rotate the dough as you roll it out. You can also use your bench scraper to help encourage the dough into a rectangular shape.
Step 12
Use a ruler to cut the sheet into 8 rectangles. To do so, cut the dough in half width wise (hamburger) and in quarters length wise (hot dog). It’s ok if the edges aren’t fully straight. Repeat with the other dough.