


Ingredients
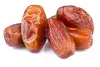
15 Medjool Dates cut in half (so 30 halves)

1 cup chocolate chips
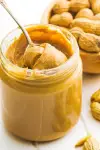
¼ cup nut butter, give or take. (Peanut works best, but other nuts reduce your potential exposure to mold so we've been doing pecan butter)
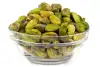
30 nuts. I like Brazil nuts best, but pecan, walnuts, pistachios, or peanuts all work great!

Flaky salt for topping
Directions
Step 1
Begin by filling each date with a little bit of nut butter. You don't want it oozing out here.

15 Medjool Dates cut in half (so 30 halves)

¼ cup nut butter, give or take. (Peanut works best, but other nuts reduce your potential exposure to mold so we've been doing pecan butter)
Step 2
Top each date half with one nut. Pop them all in the freezer to harden while we melt our chocolate.

30 nuts. I like Brazil nuts best, but pecan, walnuts, pistachios, or peanuts all work great!
Step 3
Using a double boiler (aka just a pot filled with a tinnnnny bit of water set over simmer and another heat proof bowl set over that but not touching the water) melt your chocolate. You can stir occasionally to help it all melt. You can remove it from the heat when you just have a couple of tiny chocolate pieces left, the residual heat will melt those.

1 cup chocolate chips
Step 4
If you want a thin coating of chocolate you can just start dunking now. If you want a thicker coating of chocolate let the chocolate sit for 3 minutes.
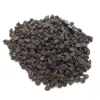
1 cup chocolate chips
Step 5
Use a fork to dunk and coat each date bite. I like to scrape the bottom of the date on the side of the bowl to remove excess chocolate from the bottom. Repeat until all date pieces are coated.
Step 6
Let them sit for another 3ish minutes THEN top with some flaky salt. I like a lot of salt personally! The mix of the sweet date and dark chocolate can really stand up to it!

Flaky salt for topping
Step 7
If you're in a rush pop them in the freezer to set, otherwise you can just put them in the fridge.
Step 8
While they won't melt at room temperature, they are most stable if stored in the fridge. So keep them in an airtight container in the fridge until you're ready to serve them.
Step 9
ENJOY!