Ingredients

260 g bread flour, plus more for dusting
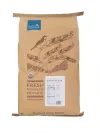
90 g einkorn

265 g water

70 g starter at 100% hydration
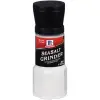
7 g salt

1 Extra tsp water
Directions
Step 1
Begin your autolyse by combining both flours and water. I like to knead the mixture for about 1 minute to ensure that there is no pesky unincorporated flour remaining. Make sure you're checking the bottom of the bowl as it likes to hide there! If you don't fully incorporate the flour at this point you will have blobs of thick bits throughout the entire process. So while the dough can look shaggy you DON'T want dry/floury. 60 seconds of kneading should do the trick.

260 g bread flour, plus more for dusting
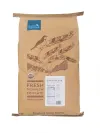
90 g einkorn

265 g water
Step 2
Mix in 70g starter and knead for about 2 minutes. I like to do a combination of stretch and folds and the rubaud method.

70 g starter at 100% hydration
Step 3
Then sprinkle the salt over the top of the dough and add the additional 1 tsp of water to help dilute it. The dough will probably start to come apart here, but that's ok! Just keep kneading or doing the rubaud method for about 2 more minutes and it should come together in a smooth ball. You don't want to over knead here!!! Once the dough looks like it's together and is smoothish, you're done.
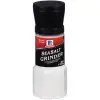
7 g salt

1 Extra tsp water
Step 4
Cover the bowl and leave it at room temp and out of direct sunlight for 1 hour.
Step 5
After the hour you're going to perform your first round of stretch and folds. Think of the dough and bowl as being four quadrants. Wet your hand and gently slip it along the bowl and under the dough at the top 1/4 quadrant. Lift the dough up (stretch) and lay it back down over the center of the dough (fold). Turn the bowl 90 degrees and repeat 3 times; aka 4 times in total. Cover the bowl and let sit for another hour.
Step 6
Repeat the stretching and folding four times in total.
Step 7
After the 4th stretch and fold it's time for the dough to just hang out and proof! Depending on the temperature of your home this could take anywhere from 2-5 extra hours. You want the dough to have doubled in size from its original volume and be jiggly when you gently shake the bowl. Focus more on the visuals than the time on the clock.
Step 8
Dust the top of the dough with flour and lightly flour a clean work surface. Gently turn out the dough onto the work surface, flour side down obviously.
Step 9
Time to pre-shape. Gently stretch the dough in all directions just to even the thickness out (it's better to stretch LESS than more). Then take the left quadrant, lift it, and fold it over to the center of the dough. Repeat with the right side, so now it's a log-ish shape. Then fold bottom top center and sort of flip it onto the top portion. So now what was just on the counter should be face up.
Step 10
Use your bench scraper and tension off the counter to sort of tighten the ball. Cover and allow to rest for 10 minutes. Prepare your banneton.
Step 11
Gently flour the top of the dough once again and flip it over. So back to flour side down! Stretch it again and repeat the same folding process on the left and right side. But this time instead of just folding the top and bottom we're going to roll it like a jelly roll. Pinch and tuck the side edges so that all seams are under the log now.
Step 12
Gently lift and place the dough into the banneton, seam side up!! I typically create even more tension by stitching the dough, but you can absolutely stop here if you're not comfortable with that. But if you want to, I "stitch" by grabbing a small portion of either side of the dough, bring it to the center and slightly past that, overlapping the opposite side. Then almost like twist them together. Then continue that motion up the entire length of the dough. By the end of it, it should look like a creep lil stitch.
Step 13
Dust with flour once more, cover, and allow to rest for another 1-3 hours. This is a tricky time to rest because it's already quite proofed and is now covered in flour. My suggestion is go for 1 hour and then eventually you'll learn your dough and what it "should" feel and look like. You can always do the poke test to gauge its rise!
Step 14
Place in the refrigerator overnight; about 12ish hours.
Step 15
Preheat the oven and dutch oven at 450F.
Step 16
Once preheated I begin getting the bread ready! To do so I take a narrow and long piece of parchment paper, cover the dough so that the longer ends of parchment are on the sides (not top and bottom) of the banneton. Then I hold tension on the parchment and turn the banneton/dough over. This just helps the dough from dropping down onto the counter and potentially losing bubbles.
Step 17
I like to dust the top with flour once more, give it a lil rub with my hand, then brush off the excess flour from the dough and parchment. Use a lame or sharp knife to score the top. If you haven't done this before I suggest just one long score.
Step 18
Then use the parchment "handles" to lift the dough and place in the preheated dutch oven. Place the lid of the dutch oven on top and bake for 25 minutes at 450F covered. After 25 minutes remove the lid, lower the temp to 425F and continue to cook for 15 minutes for a thin and light crust, 20 minutes for a thicker and more robust rust, and 25 minutes for a deeply golden and dense crust.
Step 19
Allow to FULLY COOL prior to cutting in and guess what. That's it...
Step 20
ENJOY!

